Phoenix:Main/FirstRun
Contents
Once the Phoenix application is installed and you have your desktop shortcuts, you can launch the application.
To start : Double-click the application shortcut :
License Agreement
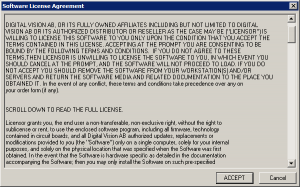
The first time you run, you will have to accept the license agreement.
Read the license and click the "ACCEPT" button.
Digital Vision User Login
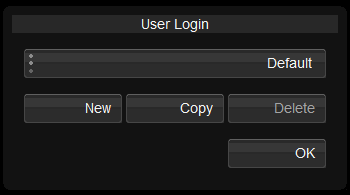
The application starts and presents you with a login screen with the "Default" user selected :
For details of the application login feature, see the manual.
For now, click "OK" to start as the "Default" user.
License Error
If you do not have a valid license for the product, you will get a license error. The example below is for Nucoda :
The dialog tells you the System ID (MAC address) the application is looking for e.g. in the above dialog we have (for example) :
System ID:
00217059af37
You can send the ID shown to the licensing department and they will send you a license.
See the Licensing section for help on requesting a license and what to do with it when you get it.
Application Folders Error
You may get an error about invalid directories (the sample below is for Nucoda, but Phoenix is similar) :
If you see this error it means that certain drives and/or folders we expect to exist can not be found.
By default, we expect three drives to exist :
- C:\ - installation folders
- D:\ - for storing projects, thumbnails etc.
- S:\ - a fast drive for caching and media
We can (and should) choose other drives and folders (as necessary) that match our own configuration.
NOTE : To get up and running quickly, all the folders we mention below can be placed on a single drive (e.g. C:\). However, you should read the folder descriptions below carefully and understand the ramifications before doing this (performance and disk space used).
To fix this problem, we need to specify these folder paths by editing a text preference file.
Alternatively, use the Preferences Assistant to view and modify settings.
Media Folders
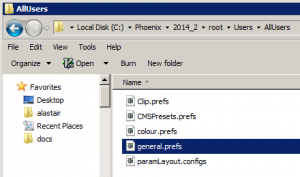
Using the Windows file browser :
Navigate to the ROOT folder e.g.
- C:\Phoenix\{VERSION}\root\
where {VERSION} will match the version of Phoenix installed e.g. folder C:\Phoenix\2014_2\root.
For a description of the application environment, including what the "ROOT" folder means, see the Phoenix Environment page.
Using a text editor (e.g. notepad), open the file :
- AllUsers / general.prefs
Find the "media" section :
media
{
    cacheRootDir ...
    ....
}
We will check (and possibly change) the following paths and folders inside the media section.
- cacheRootDir
- proxyRootDir
- thumbRootDir
- captureRootDir
- audioRootDir
- tempRootDir
Using the table below as a reference, change the folder paths to match your own requirements and system configuration.
NOTE
- Any path should set should include the drive letter.
- The path should be inside double-quotes ("").
- The path should end with a back-slash character ("\").
Example :
cacheRootDir "F:\Phoenix\2014.2\cache\"
Make sure the folders exist before running the application next time.
| Setting | Example | Notes |
| cacheRootDir | S:\Phoenix\2014_2\media\cache\ | This is where we cache i.e. generate temporary image sequences and files when rendering effects. This path is best on fast storage (e.g. RAID). Might need a lot of space (depending on file size/resolution etc.) |
| proxyRootDir | S:\Phoenix\2014_2\media\proxy\ | This is where we store proxies - if we use them. A proxy is a local copy of a remote sequence, or lower resolution versions of a sequence. This location is also used to store DPX or EXR debayered versions of RAW files if used. Might need a lot of space (depending on file size/resolution etc.). |
| thumbRootDir | D:\Phoenix\2014_2\media\thumb\ | This is where clip thumbnails are stored. No stringent space or performance requirements. |
| captureRootDir | S:\Phoenix\2014_2\media\capture\ | This is the default capture path used when recording image/video sequences from a VTR or I/O device. |
| audioRootDir | D:\Phoenix\2014_2\media\audio\ | This is the default path used for writing audio (e.g. as recorded from a VTR). It is best to use a different drive to that used for image capture (i.e. path for captureRootDir). |
| tempRootDir | D:\Phoenix\2014_2\media\temp\ | This is a drive path we use when we need to write temporary files (e.g. before staging to an Avid Interplay). |
In the above table, the S:\ drive might be a fast, external disk array (perhaps RAID-5). The D:\ drive might be an internal SSD drive (perhaps RAID-1).
Other Folders
In addition to the above folders inside the "media" section, we also need to configure some other paths :
- notesRootDir
- compositionNotesRootDir
- exportImagesRootDir
- projectRootDir
- avidDirectory
- avidExportingDirectory
These are found in the same preference file (usually below the "media" section). The same rules apply to these folders as above.
| Setting | Example | Notes |
| notesRootDir | D:\Phoenix\2014_2\notes\ | This is where we save notes (notes are an effects stack), including a reference frame. |
| compositionNotesRootDir | D:\Phoenix\2014_2\compositionNotes\ | This is where write all the notes for a composition (timeline), if we choose to save them. We write one note per shot. |
| exportImagesRootDir | D:\Phoenix\2014_2\exportImages\ | This is where we save reference snapshots taken of the current picture in the monitor. |
| projectRootDir | D:\Phoenix\2014_2\projects | This is where we store our projects. |
| avidDirectory | S:\Avid Mediafiles\ | This should be set to the top-level folder from which we search, looking for MXF media to link to an AAF composition. |
| avidExportDirectory | S:\Avid Mediafiles\MXF\1\ | Where we write exported MXF media by default (e.g. for re-link on an Avid). |
Control Panel
If you have selected a Precision Panel in the installer, the application will try and connect :
You can stop this by pressing the Cancel button.
If the panel cannot be found, a warning dialog will appear and you can check connections :
See the Precision Panel support page.
Start Up
Finally, once you have configured the preference file and set up proper folder paths, the application should start without error!
If you encounter problems, please contact our support team.


