Difference between revisions of "UM:Dvo Effects Dvo Dust"
m (Upload page Dvo_Effects_Dvo_Dust) |
m (Text replacement - "|Platform:" to "|UM:") |
||
| Line 1: | Line 1: | ||
<div class="manualcontent"> | <div class="manualcontent"> | ||
| − | {{Template:M-Navlinks-top| | + | {{Template:M-Navlinks-top|UM:Manual|UM:Dvo_Effects_Dvo_Stereo_Fix|UM:Dvo_Effects_Dvo_Fix}} |
{{Template:M-Title|DVO Dust}} | {{Template:M-Title|DVO Dust}} | ||
| Line 963: | Line 963: | ||
<p class="p_DVBodyText"><span class="f_DVBodyText"> </span></p> | <p class="p_DVBodyText"><span class="f_DVBodyText"> </span></p> | ||
| − | {{Template:M-Navlinks-bottom| | + | {{Template:M-Navlinks-bottom|UM:Manual|UM:Dvo_Effects_Dvo_Stereo_Fix|UM:Dvo_Effects_Dvo_Fix}} |
</div> | </div> | ||
Latest revision as of 12:06, 15 October 2014
DVO Dust is a fully automatic and highly accurate film dirt, dust and random scratch concealment and video drop-out removal system. It can remove around 90% of visible imperfections without introducing unwelcome artifacts.
DVO Dust utilises a pioneering set of processing algorithms and new filters with the Digital Vision Emmy award-winning PHAME motion compensation technology. With manual "dust busting" being very time consuming and expensive, the automation in DVO Dust can typically reduce the amount of operator time required by an order of magnitude. This saves enormous amounts of time and money without any compromise in terms of picture quality.
This effect has three groups of parameters:
The Enable toggle button allows the complete effect to be turned on or off.
|
Basic Settings and Presets
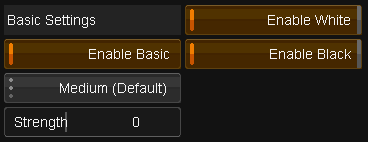
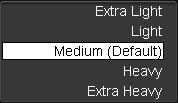
The DVO Dust effect provides a number of presets, ranging from Extra Light to Extra Heavy removal. These work as a very good starting point before moving on to the more advanced controls in the Processing and Setup tabs. You may not need to use any of the advanced parameters.
Enable Basic
The Enable Basic toggle button allows you to enable/disable basic mode. This mode uses presets to automate and hide much of the effect complexity.
When you edit any of the settings in the processing or setup tabs the basic mode becomes automatically disabled. Similarly, when you select a mode from the basic modes, all settings will be automatically adjusted to fit the selected mode and basic mode will be automatically enabled. |
Presets
This is a collection of preset settings (e.g. Extra Light, Heavy etc.) that setup the effect for a predefined level of dust/dirt.
Values : |
Extra Light, Light, Medium, Heavy, Extra Heavy |
Default : |
Medium |
Strength
This slider allows the adjustment of the strength of dust reduction processing to use. It is only available in basic mode.
Range : |
-5 to +5 |
Default : |
0 |
Enable White / Enable Black
White/black dirt removal is enabled via the corresponding Enable White/Enable Black toggle buttons.
| • | Enable Black - for black/dark spots |
| • | Enable White - for white/light spots |
Both can also be enabled at the same time.
Default : |
On |
These options also appear in the Processing tab and they are linked (changing one location affects the other).
Processing Filters
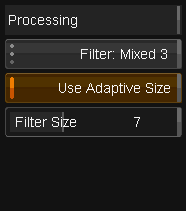
The filters used by the process are very important in determining the final processed quality. DVO Dust includes a variety of filter algorithms that can effectively process a wide range of input footage.
Spatial / Temporal / Mixed Filters
Values : |
Spatial, Mixed 1, Mixed 2, Mixed 3, Mixed 4, Temporal 1, Temporal 2, Copy Prev, Copy Next, Bypass |
Default : |
Mixed 3 |
The following generic filter groups are defined.
Spatial
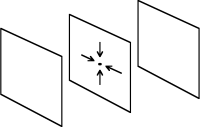
All filters named Spatial are filters that work only within the current frame (or field if the material is interlaced), i.e. it has taps only in the current frame. These filters are intended for very small spots. |
Mixed
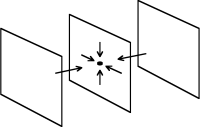
All filters named Mixed have taps in both the current frame and the frame previous to and following the current frame. That is, it has both spatial and temporal taps. All these filters however have more taps in the current frame than in the previous and following frames together (more spatial taps than temporal). These filters are intended for normal spots.
The different Mixed types (Mixed 1,2,3 etc.) change the ratio between spatial and temporal. The larger the number, the more temporal filtering. |
Temporal
Filters named Temporal have both spatial and temporal taps but with more temporal than spatial. This will enable the DVO Dust to remove any size of spots. These filters may need more careful use, to not give unwanted artefacts. |
The filter called 'Temporal 2' is a special temporal filter that uses minimum amount of information from the current frame. This means that the processed signal will not vary as much as the normal temporal filter in terms of luminance/intensity. |
Copy
|
Copy Next |
Copy Prev |
The 'Copy Next' and 'Copy Prev' filters should be used for one frame in combination with a key area and Global mode to replace a big chunk of dirt, a big hole, or a flash frame with information from the next or previous frame. |
|
Bypass
Setting the filter to Bypass will leave dirt unprocessed.
Use Adaptive Size
When the Use Adaptive Size button is enabled, the filter size automatically adjusts during processing according to the size of the dirt found.
Default : |
On |
Filter Size
This sets the size of the filter on the current frame, so it is only required for spatial and temporal filters.
Use the numeric slider to define the filter size when adaptive filter sizing is not enabled. The larger the size of the dirt the larger this value should be.
Range : |
0 to 15 |
Default : |
7 |
The Adaptation toggle button allows you to turn the adaptation processing on/off.
When this button is off, DVO Dust works in global mode, filtering the whole image with the same fixed filter selected in the Filter menu.
Note that if the Adaptation button is off then none of the adaptation controls above will have an effect. |
This numeric slider configures the degree of motion sensitivity.
Initially you can set it to 0 (most safety), for maximum motion sensitivity, and then increase it in steps if there isn't enough filtering in moving parts of the picture.
A value of 256 corresponds to no motion adaptation at all, which means that temporal filtering can be applied fully to moving parts of the image.
Range : |
0 to 256 |
Default : |
30 |
The MDC (Motion Detection Current) toggle button determines whether to look at just the previous and next field/frame, or to look at all of the previous, current, and next field/frame.
Default : |
On |
Having this option on ensures higher sensitivity and reduces artefacts down to a minimum.
For maximum filtering, the control may be set to off.
Edge
This controls material edge protection.
Edge protection acts as a safety measure and reduces the possibility of false scratch detection. Some material may require this protection e.g. houses at a distance, a forest or material with a slight weave. By turning edge protection on, the built in edge detector will affect were DVO Dust filters and it will reduce filtering where it finds edges.
Default : |
On |
Further controls for defining thresholds for edges are available in the Setup tab.
Temporal Adaptation
Temporal Adaptation acts to exclude falsely detected dust/dirt from being processed. It does this by comparing dirt detected on the current frame with dirt detected on the previous frame (within a sizable window).
This toggle button turns temporal adaptation on/off.
Default : |
Off |
The temporal adaptation settings can be found in the Setup tab.
Black / WhiteThere are two separate and independent parameter groups controlling the processing for Black (dark) and White (light) areas of dust/dirt.
Enable Black / Enable White
White/black dirt removal can be enabled via the corresponding toggle button.
| • | Enable Black - to remove black/dark spots |
| • | Enable White - to remove white/light spots |
Both can also be enabled at the same time.
Default : |
On |
Use Adaptive
If on, sets white/black contrast to be adaptive.
Default : |
On |
This will result in the algorithm determining which contrast setting is needed on a pixel-by-pixel basis.
When enabled the contrast controls change to give more, or less, effect of the adaptive contrast.
Adptv Threshold
Only applicable if Use Adaptive is on.
Range : |
-32 to 31 |
Default : |
0 |
Fixed Threshold
Only applicable if Use Adaptive is off.
Range : |
0 to 63 |
Default : |
30 |
You should lower the thresholds if you have very low contrast white spots on light background, or black spots on dark background, and increase the thresholds if the luminance difference between the spots and the background is less:
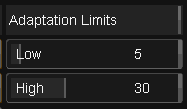
Contrast Adaptation Limits
The contrast adaptation low and high limit controls only work in the adaptive mode and are used to specify the range of contrast settings that the adaptation is allowed to work in.
The upper limit is normally set to the non-adaptive contrast setting you normally use. If both limits are set to the same value the result is exactly the same as when using non-adaptive contrast.
Low
Range : |
0 to 63 |
Default : |
5 |
High
Range : |
0 to 63 |
Default : |
30 |
Other Settings
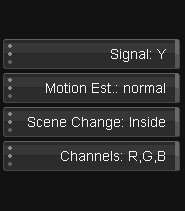
SignalThis selects the signal (channel) within which scratches/dirt will be detected.
Values : |
Y,U,V,R,G,B,Y+U+V |
Default : |
Y |
The adaptation works on one channel only, normally 'Y'. By setting the signal to 'R', for example, when only red scratches are visible, the DVO Dust will more precisely detect the dirt, minimizing the risk of affecting actual picture content.
Motion EstimationThis drop-down button allows you to choose the motion estimation.
Values : |
off, normal, best |
Default : |
normal |
When enabled, the motion estimation module gives a performance boost, both in dirt detection and concealment. This means that much more aggressive settings can be used without introducing smearing.
Scene ChangeThis drop-down button gives options for how to process the frames surrounding an edit/cut point:
| • | Inside - processes the frame before a cut using only the current and previous frame, and processes the frame after a cut using only the current and next frame. Stays inside the shot. |
| • | Across - ignores cuts, use the previous, current, and next frame. Goes across shots. |
| • | Bypass - doesn't process the frames before or after a cut. |
Values : |
Inside, Across, Bypass |
Default : |
inside |
This control is for selecting the channels from which dirt will be removed.
Normally the processing should be set to all channels, but in some cases, especially with small dirt, better results can be achieved by processing only one or two of the channels.
Values : |
Any combination of R,G and B. |
Default : |
R,G,B |
Setup
View
Turning on the View toggle button will provide an overlay/preview showing detected dirt. The type of overlay can be selected via the View Mode drop-down list:
Default : |
Off |
View Mode
Values : |
Dirt On Luma, Dirt On Red Input, Dirt On Red Output, Difference |
Default : |
Dirt On Luma |
Where :
| • | Dirt On Luma - The detected scratches/dirt are high-lighted on a monochrome input picture with lowered luminance. |
| • | Dirt On Red Input - The detected scratches/dirt are shown with red on the unprocessed input signal. |
| • | Dirt On Red Output - The detected scratches/dirt are shown with red on the processed output signal. |
| • | Difference - The difference between the unprocessed input and the processed output is displayed. |
The drop-down list will default to the project setting for the input format. You need to set this control according to the material that you are working with. If the footage was shot with a video camera, select a linear format. If this control is not set correctly the material may not be processed properly.
Default : |
From Project |
The DVO Dust effect is recursive.
For best results a certain amount of frame history needs to be built up, and this numeric slider is used to specify how many frames of history to use.
Range : |
0 to 15 |
Default : |
5 frames |
The Use Handles button controls whether the history includes available handles of a scene/shot. Normally, the history frames accumulated will terminate on a shot edit/event (start/end edit). There may be extra frames available (handles) before or after the start and end edit points of a shot however and these will be included as history if Use Handles is set.
Default : |
On |
The remaining controls on the Setup page are used to optimize the processing further. These controls should only be used by experienced operators with a good understanding of the dirt and scratch concealment process.
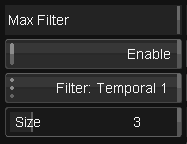
Max FilterEnable
In addition to the filter selected in the Processing tab, a separate max filter can be enabled.
The Max Filter will only be used when Use Adaptive is enabled in the Processing tab.
Default : |
Off |
Filter
Use this drop-down button to select the max filter with which to process large stains.
Values : |
Spatial, Mixed 1, Mixed 2, Mixed 3, Mixed 4, Temporal 1, Temporal 2, Copy Prev, Copy Next, Bypass |
Default : |
Temporal 1 |
When the Max Filter is enabled, the normal filter used for the adaptive filter sizing will take care of the small dirt. When the upper size limit is reached it will automatically switch over to the filter selected here.
The Max Filter can also be set to Bypass, which will leave big stains unprocessed. These can be processed later by a de-blotcher or 3rd party software.
Size
This specifies the size of the spatial part of the filter (for spatial and mixed filter types).
Range : |
0 to 15 |
Default : |
3 |
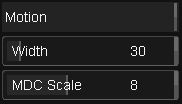
Width
Motion Width is used in combination with the Motion control in the Processing section and defines the motion adaptation behaviour. When motion width is set to 0, the motion setting will be used as a threshold discriminating between moving and non-moving parts. When motion width is set to a non-zero value, the classification will change gradually from “no motion” to “full motion”. Motion width then specifies the size of the transition region.
Range : |
0 to 255 |
Default : |
30 |
MDC Scale
The MDC (Motion Detection Current) toggle button in the Processing section determines whether to look at just the previous and next field/frame, or to look at all of the previous, current, and next field/frame.
The higher the scale setting, the more filtering (less impact of the MDC algorithm).
Range : |
0 to 15 |
Default : |
8 |
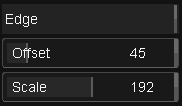
Offset
The edge offset acts like a threshold, determining how well-defined edges have to be before the edge control has any effect. The smaller the offset value the sooner the edge control will have an effect.
Range : |
0 to 255 |
Default : |
45 |
Scale
Edge scale sets the sensitivity of the edge control. The higher the setting the more pronounced the effect of the edge control.
Range : |
0 to 255 |
Default : |
192 |
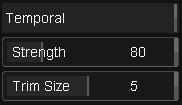
The purpose of temporal adaptation is to exclude falsely detected dirt from processing by comparing it with the previous frame's detected dirt within a sizable window.
Strength
The strength level determines the amount of influence that the previous frame's detected dirt will have on exclusion of dirt detection in the current frame. A higher value will result in more dirt being excluded and less processing carried out.
Range : |
0 to 255 |
Default : |
80 |
Trim Size
The trim size corresponds to a "window" in the previous frame which is searched for dirt to compare against the current frame. The smaller the window (trim size) the more filtering that will be achieved.
Range : |
0 to 7 |
Default : |
5 |
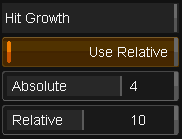
The Hit Growth control is useful when the dirt in the image does not have very well-defined edges.
By increasing the hit growth the processor is told that the dirt is bigger than it actually appears. The result is that the soft edges also are processed.
Mode
Absolute
Use Relative button off.
The hit mask for all sizes of scratches are grown by the same amount as specified with the strength control
Range : |
0 to 4 |
Default : |
4 |
Relative
Use Relative button on (default)
In relative mode large scratches cause a larger growth.
Range : |
0 to 15 |
Default : |
10 |
The Absolute and Relative sliders control the amount of hit mask growth for each mode. The higher the value, the larger the area around the scratch that will be processed.
